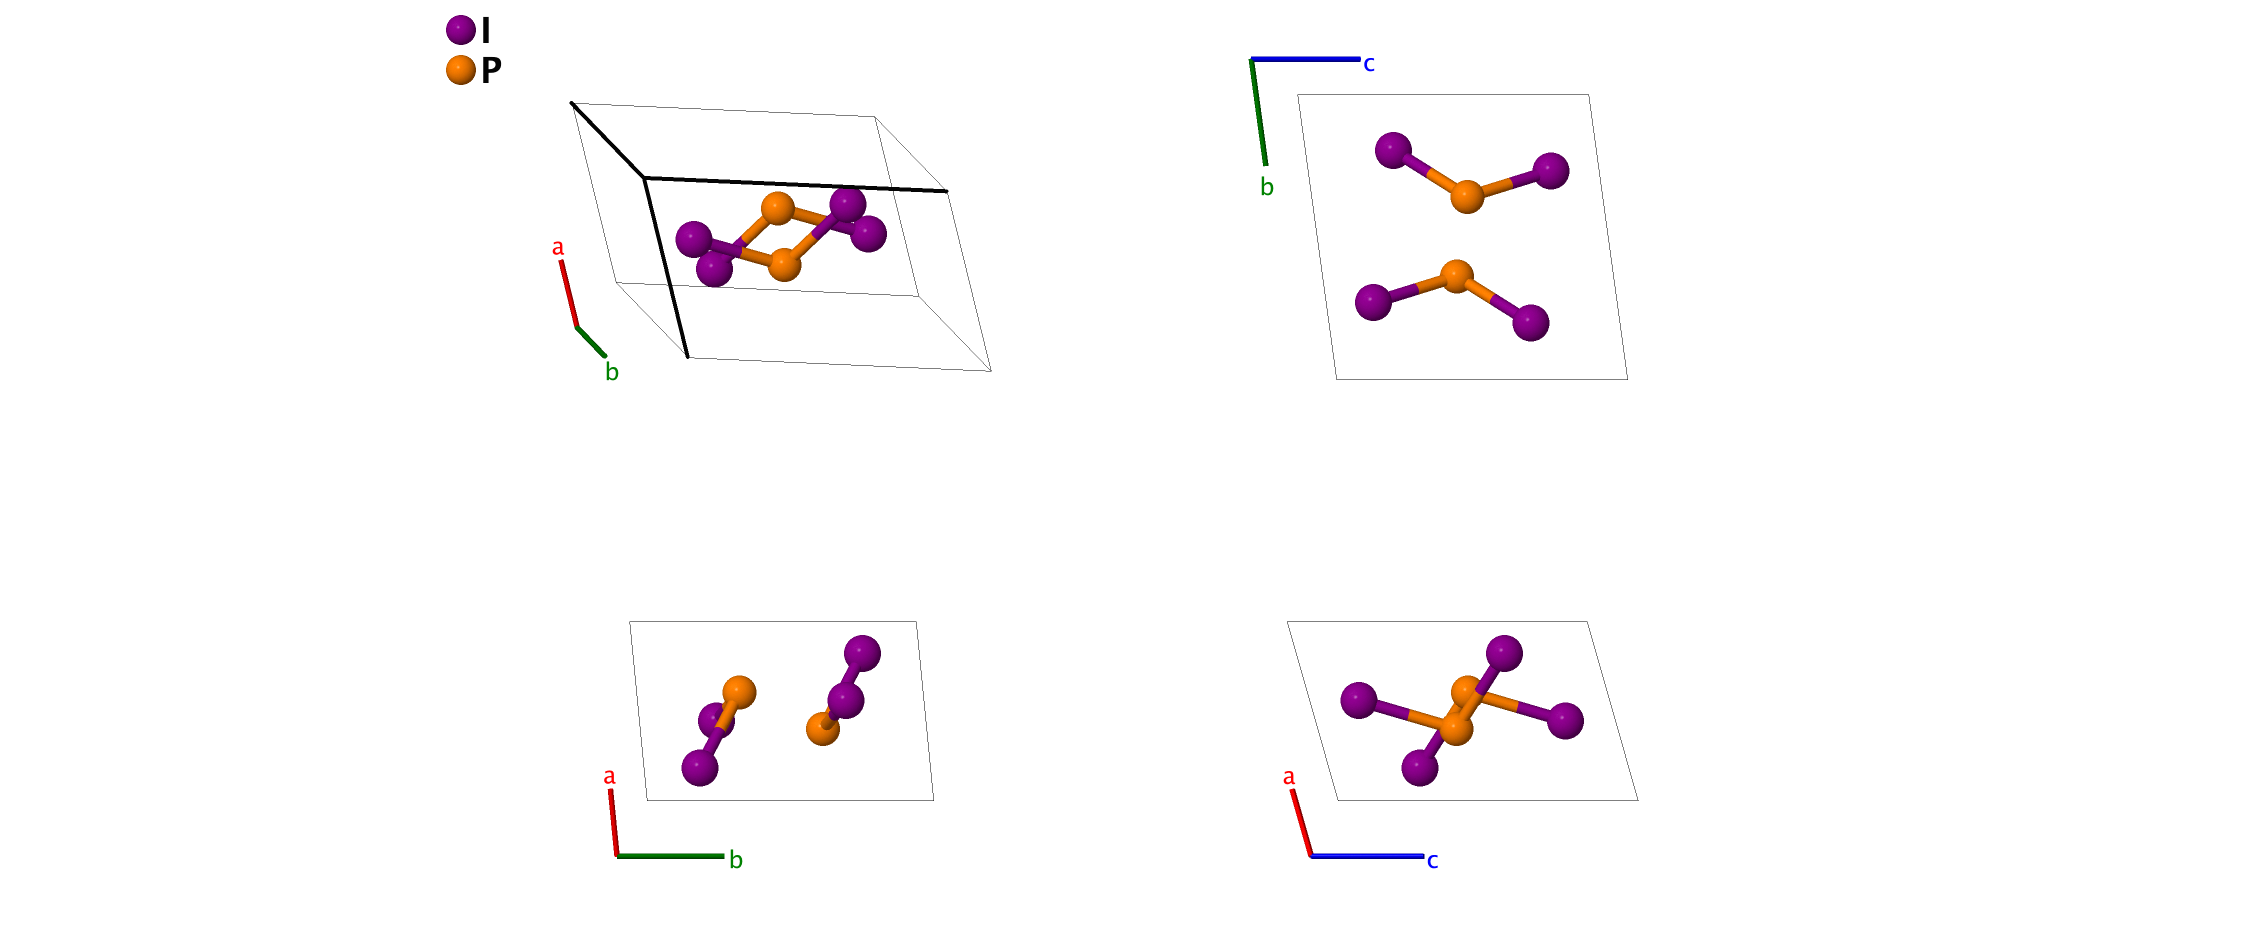
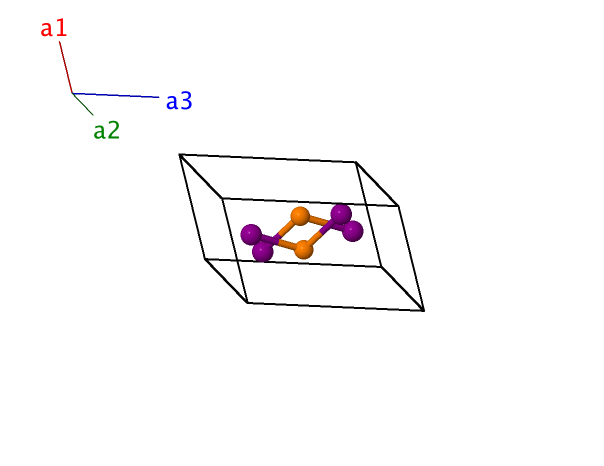
P2I4 Structure: A2B_aP6_2_2i_i
| Prototype | : | P2I4 |
| AFLOW prototype label | : | A2B_aP6_2_2i_i |
| Strukturbericht designation | : | None |
| Pearson symbol | : | aP6 |
| Space group number | : | 2 |
| Space group symbol | : | $\mbox{P}\bar{1}$ |
| AFLOW prototype command | : | aflow --proto=A2B_aP6_2_2i_i --params=$a,b/a,c/a,\alpha,\beta,\gamma,x_{1},y_{1},z_{1},x_{2},y_{2},z_{2},x_{3},y_{3},z_{3}$ |
Triclinic primitive vectors:
\[
\begin{array}{ccc}
\mathbf{a}_1 & = & a \mathbf{\hat{x}} \\
\mathbf{a}_2 & = & b \cos\gamma \, \mathbf{\hat{x}} + b \sin\gamma \,\mathbf{\hat{y}} \\
\mathbf{a}_3 & = & c_x \mathbf{\hat{x}}
+ c_y \, \mathbf{\hat{y}}
+ c_z \, \mathbf{\hat{z}}
\end{array}
\]
Basis vectors:
\[ \begin{array}{ccccccc} & & \mbox{Lattice Coordinates} & & \mbox{Cartesian Coordinates} &\mbox{Wyckoff Position} & \mbox{Atom Type} \\ \mathbf{B}_{1} & =& x_{1} \, \mathbf{a}_{1} + y_{1} \, \mathbf{a}_{2} + z_{1} \, \mathbf{a}_{3}& =& \left(x_{1} \, a + y_{1} \, b \, \cos\gamma \, + z_{1} \, c_x\right)\, \mathbf{\hat{x}}+ \left(y_{1} \, b \, \sin\gamma + z_{1} \, c_y\right) \, \mathbf{\hat{y}}+ z_{1} \, c_z \, \mathbf{\hat{z}}& \left(2i\right) & \mbox{I I} \\ \mathbf{B}_{2} & =& - x_{1} \, \mathbf{a}_{1} - y_{1} \, \mathbf{a}_{2} - z_{1} \, \mathbf{a}_{3}& =& - \left(x_{1} \, a + y_{1} \, b \, \cos\gamma \, + z_{1} \, c_x\right)\, \mathbf{\hat{x}}- \left(y_{1} \, b \, \sin\gamma + z_{1} \, c_y\right) \, \mathbf{\hat{y}}- z_{1} \, c_z \, \mathbf{\hat{z}}& \left(2i\right) & \mbox{I I} \\ \mathbf{B}_{3} & =& x_{2} \, \mathbf{a}_{1} + y_{2} \, \mathbf{a}_{2} + z_{2} \, \mathbf{a}_{3}& =& \left(x_{2} \, a + y_{2} \, b \, \cos\gamma \, + z_{2} \, c_x\right)\, \mathbf{\hat{x}}+ \left(y_{2} \, b \, \sin\gamma + z_{2} \, c_y\right) \, \mathbf{\hat{y}}+ z_{2} \, c_z \, \mathbf{\hat{z}}& \left(2i\right) & \mbox{I II} \\ \mathbf{B}_{4} & =& - x_{2} \, \mathbf{a}_{1} - y_{2} \, \mathbf{a}_{2} - z_{2} \, \mathbf{a}_{3}& =& - \left(x_{2} \, a + y_{2} \, b \, \cos\gamma \, + z_{2} \, c_x\right)\, \mathbf{\hat{x}}- \left(y_{2} \, b \, \sin\gamma + z_{2} \, c_y\right) \, \mathbf{\hat{y}}- z_{2} \, c_z \, \mathbf{\hat{z}}& \left(2i\right) & \mbox{I II} \\ \mathbf{B}_{5} & =& x_{3} \, \mathbf{a}_{1} + y_{3} \, \mathbf{a}_{2} + z_{3} \, \mathbf{a}_{3}& =& \left(x_{3} \, a + y_{3} \, b \, \cos\gamma \, + z_{3} \, c_x\right)\, \mathbf{\hat{x}}+ \left(y_{3} \, b \, \sin\gamma + z_{3} \, c_y\right) \, \mathbf{\hat{y}}+ z_{3} \, c_z \, \mathbf{\hat{z}}& \left(2i\right) & \mbox{P} \\ \mathbf{B}_{6} & =& - x_{3} \, \mathbf{a}_{1} - y_{3} \, \mathbf{a}_{2} - z_{3} \, \mathbf{a}_{3}& =& - \left(x_{3} \, a + y_{3} \, b \, \cos\gamma \, + z_{3} \, c_x\right)\, \mathbf{\hat{x}}- \left(y_{3} \, b \, \sin\gamma + z_{3} \, c_y\right) \, \mathbf{\hat{y}}- z_{3} \, c_z \, \mathbf{\hat{z}}& \left(2i\right) & \mbox{P} \\ \end{array} \]References
- Y. Chu Leung and J. Waser, The Crystal Structure of Phosphorus Diiodide, P2I4, J. Phys. Chem. 60, 539–543 (1956), doi:10.1021/j150539a007.